Can I Log Out Again at Jad
For the minigame in which players fight confronting each other, run across TzHaar Fight Pit.
"Fight Cave" redirects hither. For its tougher sequel, run into Fight Kiln.
![]()
The TzHaar Fight Cave is a minigame in RuneScape released on 4 October 2005. Information technology involves single-handedly fighting off 62 waves of TzHaar creatures, not including a boss fight against one of the strongest monsters on RuneScape: TzTok-Jad, with a combat level of 702. Players will be rewarded with Tokkul for playing this minigame, and if they manage to defeat TzTok-Jad, they volition be rewarded with the burn cape - the fourth strongest cape in the game after TokHaar-Kal, Max cape and the Completionist greatcoat. Completing the entire TzHaar Fight Caves gives about 130,000 experience in gainsay skills and nigh 45,000 experience in constitution, giving roughly 175,000 experience full for completing the fight caves, including Jad. This is a safe minigame, equally you lot will go on all your items if you lot dice. Nonetheless, you volition not keep the ammo, food, and potions already used when you dice, so doing the fight cavern is not cost free.
Up until the release appointment of this minigame, the Kalphite Queen was the most powerful creature in RuneScape. The TzHaar Fight Cave introduced 2 higher-level monsters: TzTok-Jad and Ket-Zek, though the Kalphite Queen is widely regarded every bit more than difficult to defeat than the Ket-Zek. TzTok-Jad was the strongest monster in the game for three years, until the release of the Corporeal animal. Many college-levelled monsters have been released since, but TzTok-Jad is still one of the strongest monsters in terms of offensive powers, existence able to one- or two-hit players. In February 2012 the Fight Kiln minigame was released, which introduced a stronger version of Jad: the TokHaar-Jad.
Playing this minigame until the end takes a considerable corporeality of time and resources; it can take anywhere from 30 minutes (with very strong gear and feel) to ii.5 hours of continuous playing and a considerable number of potions depending on levels, supplies, and method. At 70-80 range, it can take from 90–120 minutes to consummate; at 90+ Ranged it can take as little as just over an hour to go to TzTok-Jad; at 99 attack and strength, with the use of Overloads, Turmoil and chaotic weaponry meleeing, it tin can take 35–50 minutes to complete. Familiars and pets are banned from the fight caves. Saving progress or taking breaks, can be done by logging out betwixt waves, but is risky. A good Cyberspace connection is as well very helpful, equally lag in the Fight Cavern at the wrong moment tin be deadly. Playing on a earth with a depression ping value and playing on a low-populated world decrease the adventure of lag.
Contents
- one Location
- 2 Map
- 3 Monsters
- 4 Monsters list
- 5 TzTok-Jad
- five.1 General data
- 5.ii Attacks
- 5.3 Healers
- half-dozen TzHaar slayer task
- 7 Rewards
- 8 Achievements
- nine Trivia
Location
The Fight Cave is located in TzHaar City, deep under the ground of Karamja. First of all, the player has to travel to Karamja. There are a few means to do this:
- Travel past send from Port Sarim or Ardougne - this will cost thirty coins, unless the thespian brings a ring of charos (a), or if the player has received the karamja gloves (then it will exist 15 coins).
- Teleport with a charged amulet of celebrity to Karamja.
- Teleport to one'southward Player-owned business firm in Brimhaven.
- Using a chipped teleport tablet to teleport to the POH portal in Brimhaven.
- Use the fairy rings ( B L P ) to teleport directly to TzHaar city.
- Apply the Fight Caves selection on the TokKul-Zo ring.
- Teleport with Karamja gloves, then pay 10 coins to travel past cart.
- Teleport using the Lodestone Network to the Karamja lodestone due south-west of Brimhaven, then go north-east.
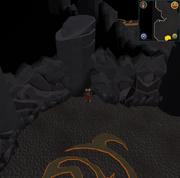
If using ane of the 1st 3 options the player so has to make their style to Karamja volcano, due east of Brimhaven and due west of Musa Betoken. At that place are two dungeon entrances at the top of the volcano, the big entrance at the centre of the lava lake leads to the TzHaar Metropolis. In one case inside, walk northward and and so turn w just earlier you reach the small summoning obelisk, look for the bank and minigame symbol on the minimap. This is the entrance to the Fight Caves.

More than one unit may spawn on the same spot, sometimes creating a safespot for some of the monsters.
Map
The Fight Cave is a large cavern that has three 'rocks' that can be used as

A map of the Fight Cavern
rubber spots: Boot Rock (west), Lava Rock (north), Bottle Rock (east) and the corner of the lava pool to the south east which tin can trap even the pocket-size ones from the correct angle. None of the safe spots work for modest monsters, commonly the tactic is to lure the monsters to a abrupt corner. The entrance is located in the northeastern corner of the cave. The monsters spawn in specific locations on the map. Known locations are the centres of each corner-pocket, as well as some in the central area.
Monsters are hands trapped with this spot.
The stone outcrop to the west is splendid for trapping monsters. If the player stands at the 2-foursquare wide depression on the south side of the rock, only monsters from the south could attack them. This is also good for luring TzTok-Jad closer.
Monsters
In this minigame, players must battle past waves of 6 types of monsters ranging from level 22 upwardly to level 360, before facing the final boss, the level 702 TzTok-Jad. Each of these monsters crave a different tactic past the histrion, though, due to the structure of the minigame, most of them are best fought from a distance. The monsters generally accept loftier Attack and Strength, along with a special ability, but low life points and Defence force. This ways they will hit difficult and oftentimes, only can exist killed quite easily.
Monsters in the Fight Cave tin can exist seen as representing powers of two minus 1: each wave, monsters will spawn whose place values sum to the wave number, with the Tz-Kih(22) being worth 1, the Tz-Kek(45) 3, the Tok-Xil(90) 7, the Yt-MejKot(180) 15, the Ket-Zek(360) 31, and finally, the Tz-Tok Jad(702) 63. Withal, waves in the Fight Cave prefer to spawn high-level creatures (due east.grand. wave 31 spawns one Ket-Zek instead of 31 Tz-Kihs). For example, consider wave 47 as having 47 points: a Ket-Zek with a bespeak value of 31 spawns, because that is the highest creature whose point value can fit in 47; and so, of the remaining 16 point, a Yt-Mejkot with a value of 15 spawns, and a Tz-Kih spawns with the remaining 1 point. Thus wave 47 consists of one Ket-Zek, i Yt-MejKot, and one Tz-Kih. The final moving ridge of the Fight Caves is wave 63, in which one Tz-Tok Jad, with a value of 63, spawns.
| Monster | Level | Number |
|---|---|---|
| Tz-Kih | 22 | 48 |
| Tz-Kek | 45 | 40 + 80 |
| Tok-Xil | 90 | 36 |
| Yt-MejKot | 180 | 34 |
| Ket-Zek | 360 | 33 |
| TzTok-Jad | 702 | 1 |
| Yt-HurKot | 108 | four (or multiples) |
| Total Creatures: | 272 (276 with ane wave of healers) | |
| Wave | Monsters | Advised overhead prayer/curse |
|---|---|---|
| 1 | 1 Tz-Kih(22) | None |
| 2 | two Tz-Kih(22) | |
| 3 | 1 Tz-Kek(45) | |
| 4 | one Tz-Kek(45), ane Tz-Kih(22) | |
| 5 | one Tz-Kek(45), ii Tz-Kih(22) | |
| 6 | ii Tz-Kek(45) | |
| vii | 1 Tok-Xil(90) | |
| 8 | 1 Tok-Xil(90), 1 Tz-Kih(22) | |
| 9 | 1 Tok-Xil(ninety), 2 Tz-Kih(22) | |
| x | 1 Tok-Xil(90), 1 Tz-Kek(45) | |
| eleven | one Tok-Xil(90), 1 Tz-Kek(45), one Tz-Kih(22) | |
| 12 | 1 Tok-Xil(xc), one Tz-Kek(45), 2 Tz-Kih(22) | |
| 13 | one Tok-Xil(xc), ii Tz-Kek(45) | |
| 14 | two Tok-Xil(90) | |
| 15 | 1 Yt-Mejkot(180) | None |
| 16 | i Yt-Mejkot(180), 1 Tz-Kih(22) | |
| 17 | i Yt-Mejkot(180), 2 Tz-Kih(22) | |
| 18 | i Yt-Mejkot(180), 1 Tz-Kek(45) | |
| nineteen | 1 Yt-Mejkot(180), 1 Tz-Kek(45), 1 Tz-Kih(22) | |
| 20 | i Yt-Mejkot(180), 1 Tz-Kek(45), two Tz-Kih(22) | |
| 21 | 1 Yt-Mejkot(180), 2 Tz-Kek(45) | |
| 22 | one Yt-Mejkot(180), 1 Tok-Xil(90) | |
| 23 | 1 Yt-Mejkot(180), ane Tok-Xil(ninety), i Tz-Kih(22) | |
| 24 | one Yt-Mejkot(180), 1 Tok-Xil(90), 2 Tz-Kih(22) | |
| 25 | i Yt-Mejkot(180), ane Tok-Xil(90), 1 Tz-Kek(45) | |
| 26 | one Yt-Mejkot(180), i Tok-Xil(xc), one Tz-Kek(45), 1 Tz-Kih(22) | |
| 27 | one Yt-Mejkot(180), 1 Tok-Xil(ninety), 1 Tz-Kek(45), two Tz-Kih(22) | |
| 28 | 1 Yt-Mejkot(180), 1 Tok-Xil(90), 2 Tz-Kek(45) | |
| 29 | 1 Yt-Mejkot(180), two Tok-Xil(90) | |
| 30 | ii Yt-Mejkot(180) | |
| 31 | 1 Ket-Zek(360) | |
| 32 | 1 Ket-Zek(360), ane Tz-Kih(22) | |
| 33 | 1 Ket-Zek(360), 2 Tz-Kih(22) | |
| 34 | one Ket-Zek(360), i Tz-Kek(45) | |
| 35 | 1 Ket-Zek(360), 1 Tz-Kek(45), 1 Tz-Kih(22) | |
| 36 | 1 Ket-Zek(360), 1 Tz-Kek(45), 2 Tz-Kih(22) | |
| 37 | 1 Ket-Zek(360), ii Tz-Kek(45) | |
| 38 | 1 Ket-Zek(360), ane Tok-Xil(xc) | |
| 39 | 1 Ket-Zek(360), 1 Tok-Xil(xc), 1 Tz-Kih(22) | |
| 40 | 1 Ket-Zek(360), one Tok-Xil(90), ii Tz-Kih(22) | |
| 41 | ane Ket-Zek(360), 1 Tok-Xil(90), 1 Tz-Kek(45) | |
| 42 | ane Ket-Zek(360), i Tok-Xil(ninety), 1 Tz-Kek(45), 1 Tz-Kih(22) | |
| 43 | 1 Ket-Zek(360), 1 Tok-Xil(90), 1 Tz-Kek(45), 2 Tz-Kih(22) | |
| 44 | one Ket-Zek(360), 1 Tok-Xil(90), ii Tz-Kek(45) | |
| 45 | 1 Ket-Zek(360), 2 Tok-Xil(xc) | |
| 46 | 1 Ket-Zek(360), 1 Yt-Mejkot(180) | |
| 47 | 1 Ket-Zek(360), i Yt-Mejkot(180), one Tz-Kih(22) | |
| 48 | ane Ket-Zek(360), 1 Yt-Mejkot(180), ii Tz-Kih(22) | |
| 49 | 1 Ket-Zek(360), 1 Yt-Mejkot(180), ane Tz-Kek(45) | |
| 50 | 1 Ket-Zek(360), 1 Yt-Mejkot(180), ane Tz-Kek(45), i Tz-Kih(22) | |
| 51 | 1 Ket-Zek(360), one Yt-Mejkot(180), 1 Tz-Kek(45), 2 Tz-Kih(22) | |
| 52 | 1 Ket-Zek(360), 1 Yt-Mejkot(180), 2 Tz-Kek(45) | |
| 53 | i Ket-Zek(360), i Yt-Mejkot(180), 1 Tok-Xil(90) | |
| 54 | one Ket-Zek(360), 1 Yt-Mejkot(180), 1 Tok-Xil(90), 1 Tz-Kih(22) | |
| 55 | 1 Ket-Zek(360), 1 Yt-Mejkot(180), ane Tok-Xil(ninety), 2 Tz-Kih(22) | |
| 56 | 1 Ket-Zek(360), 1 Yt-Mejkot(180), 1 Tok-Xil(90), 1 Tz-Kek(45) | |
| 57 | i Ket-Zek(360), 1 Yt-Mejkot(180), one Tok-Xil(90), 1 Tz-Kek(45), i Tz-Kih(22) | |
| 58 | 1 Ket-Zek(360), 1 Yt-Mejkot(180), ane Tok-Xil(xc), 1 Tz-Kek(45), ii Tz-Kih(22) | |
| 59 | 1 Ket-Zek(360), i Yt-Mejkot(180), ane Tok-Xil(90), 2 Tz-Kek(45) | |
| 60 | 1 Ket-Zek(360), one Yt-Mejkot(180), 2 Tok-Xil(ninety) | |
| 61 | ane Ket-Zek(360), 2 Yt-Mejkot(180) | |
| 62 | 2 Ket-Zek(360) | |
| 63 | 1 TzTok-Jad(702), 4 Yt-HurKot(108) | |
The monsters are in social club of appearance by wave number:
Monsters listing
| First Wave | Level | Proper name | Life points | Attack style | Max hit (approx.) | Weakness | Notes |
|---|---|---|---|---|---|---|---|
| 1 | 22 | Tz-Kih | 3000 | | 300 | | Uses melee attacks. Drains |
| 3 | 45 | Tz-Kek | 6200 | | 300 | | A melee fighter. The least dangerous monster in the cave (as information technology does not drain prayer unlike Tz-Kih) so this should be a player'southward everyman priority to kill. When it dies, ii level 22 Tz-Keks take its place. |
| 3 | 22 | Tz-Kek | 6200 | | 300 | | Two of these appear when a level 45 Tz-Kek is killed. They accept identical stats to their larger counterparts. |
| 7 | 90 | Tok-Xil | 7500 | | 780 | | An accurate Ranged fighter that tin deal devastating damage. The actor's second priority to kill unless the Tz-Kih is trapped behind an object or monster. Praying against these in the early waves is brash. When unable to pray against Ranged attacks, the role player could walk up to melee range to assault this monster since its melee attacks are weaker. |
| 15 | 180 | Yt-MejKot | 10000 | | 1100 | | A slow melee fighter; the histrion'due south quaternary priority to kill. Tin easily be trapped behind a rock or a Ket-Zek, and is not much of a threat when trapped. This monster can heal itself and other monsters when attacking the player. |
| 31 | 360 | Ket-Zek | 15000 | | 1500 | | A very large and fairly dangerous monster - the player's third priority to impale. Use safespots combined with Prayer (Practise not soulsplit if you lot don't have good enough gear because he will hit more than than 3000 without deflect magic prayer) to aid reduce their damage. When in melee range, it will employ both Magic and melee attacks. These can be used in the subsequently waves to block the Yt-MejKots. |
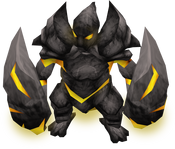
| 63 | 702 | TzTok-Jad | 40000 | | 8000 | | The last dominate of the Fight Cave. Uses Ranged, Magic and melee attacks. Has one of the highest max hits of any monster in RuneScape. Almost impossible to kill without using the right prayers. See text for more details. |
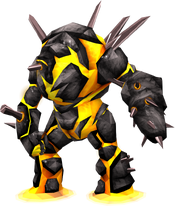
| 63 | 108 | Yt-HurKot | 10000 | | 140 | | Iv of them appear when TzTok-Jad is at one-half health to heal it; these must be killed or distracted. They can heal each other or themselves when in melee range like their cousin the Yt-MejKot. If they heal TzTok-Jad dorsum to full health before being killed, they will spawn once again. |


Recommended priority: Tz-Kih (22) > Tok-Xil (90) > Ket-Zek (360) > Yt-MejKot (180) > Tz-Kek (45)
TzTok-Jad
TzTok-Jad is the final monster encountered in the Fight Cave. Examining it yields the discouraging message "This is going to hurt...". Information technology is i of the highest levelled monsters in all of RuneScape that players tin fight with conventional methods. Defeating TzTok-Jad requires a huge amount of persistence and determination, as TzTok-Jad is rarely defeated in the offset few tries by even the best RuneScape players.
General data
In order for one to reach TzTok-Jad, one must commencement endure 62 waves of fighting progressively tougher monsters. The current wave that the player is on is shown at the first of each wave. TzTok-Jad himself is a level 702, huge, iv-legged behemoth and uses all iii sides of the combat triangle - magic, ranged and melee. TzTok-Jad will not assail with melee unless the player is adjacent to him. There is no setup animation for TzTok-Jad'due south melee assault, unless y'all are already using protect from melee when he starts his attack, you volition not have fourth dimension to switch prayers for it. When the player is in melee range, TzTok-Jad volition still utilize Magic and Ranged attacks besides. If the histrion attacks from a altitude - which is strongly recommended for inexperienced players - TzTok-Jad volition alternate betwixt Magic and Ranged attacks.
Attacks
Survival depends on watching TzTok-Jad'south movements - an animation precedes the attack, telling the player which prayer to use. While it's strongly recommended to pray against range first, it is never known which assault he uses offset until information technology is too belatedly. Be careful of this, as you can be killed within seconds of starting the moving ridge. Take automobile-retaliate on and prepare for the fight. Also note: Once you're informed of TzTok-Jad coming, DO Non Wait to click that bold that's your cue, he comes immediately, whether you click continue or not.
- Melee: TzTok-Jad swipes at the actor without warning using his right claw. This is the fastest attack, but if the player stays at a altitude, they should non encounter it. If y'all are engaging in melee combat, protect from melee should always be on at all times unless prompted to switch by his Magic and Ranged animations.
- Magic: TzTok-Jad breathes fire shortly and lowers/bows his head earlier raising his front end feet and emitting a fireball - the role player must plough on their prayer now. And so, the spell volition be fired at the player. Make sure to activate prayer before the ball hits you lot. If you fail to do then you WILL be hit. The mechanics changed after EOC- you no longer need to activate the prayer long earlier the projectile itself actually hits. Before an update which occurred on 25 May 2011, the same sound as the Retribution prayer being turned on would be played before the attack is launched, which made it easier to identify information technology. This audio could exist heard regardless of your proximity to TzTok-Jad. Since the update, neither TzTok-Jad nor Ket-Zek (Level 126) has a audio to accompany their Magic attacks. This has made it more difficult for players to determine which attack he is using when he spawns. Information technology is recommended to pray ranged defense, as this is his most common assail when he spawns, and to have automobile-retaliate activated so that you can notice him quickly to watch for his next assail.
- Ranged: TzTok-Jad slams downwards his forepart legs onto the basis, and large cracks will appear in the floor at his feet - the actor should plow on ranged prayer now, though later EOC the prayer doesn't need to exist active before the hitsplat actually shows,so don't panic if you activate a fleck late. Equally long as you actuate the prayer before the hitsplat shows the damage volition be evaded. If y'all fail to exercise this you will exist hit. Next, a boulder will fall down on the histrion, which cannot be avoided by moving. Occasionally he will exhale burn down at the starting time of this assail also, it is unknown if this is intentional or not.
Although somewhat irksome, all of these attacks tin can deal enough impairment in a unmarried blow to kill even the nigh powerful of players if not guarded confronting via using the correct protection prayer, every bit TzTok-Jad has a maximum hitting of 6280+ and hits very accurately. If you accept vengeance spells, y'all tin can have advantage of his extremely high hits by assuasive him to hit you once, (provided your life points are above 6290, so you accept a 100% hazard of surviving a hit.) and rebounding very high hits back at him, ordinarily in the high 700s. It is strongly recommended to bring either Saradomin brews and super restores or Rocktails to heal to a higher place your maximum life points the wave right before Jad, in case things might go wrong.
Healers
When TzTok-Jad is down to half wellness, he volition summon 4 Yt-HurKots (level 108 melee fighters with 10,000 LP and tiny in comparing) which will heal him, effectively causing him to regenerate endlessly until they are dealt with. When in melee range of the player, the Yt-HurKots will heal themselves. If you lot plan on killing the Yt-HurKots it is wise to kite them around TzTok-Jad, otherwise they are much harder to impale. In guild to terminate them from healing, they need to be killed, one by 1, so they don't heal each other, but don't forget most the TzTok-Jad waiting to kill you lot. If you impale them afterwards TzTok-Jad has been healed to total health, when you get him down to half wellness, the Yt-HurKots volition respawn again. However, if you manage to kill all 4 of the Yt-HurKots before they bring Jad upwardly to total health, they will not respawn when a player brings TzTok-Jad downwards to one-half health again. The Yt-HurKots' melee attacks hit up to 140.
Distracting may not work unless they are stuck behind south-west wall. Since the Development of Combat, healers will continue to heal TzTok-Jad fifty-fifty if they have been attacked one time. It is recommended to kill healers if attempting to kill TzTok-Jad especially if you are attempting at a lower level. (You tin can finer kite them as long as they go far away from Jad, as they must be inside proximity of him to heal)
TzHaar slayer chore
Since the release of Kuradal, players may now receive Tzhaar creatures as Slayer tasks. Upon receiving the assignment, Kuradal will offer a player the pick to upgrade the chore to "280 volcanic creatures of the Tzhaar Fight Caves." Defeating TzTok-Jad on this special consignment volition give a bonus of 25,000 Slayer experience, the largest amount of experience to be gained from any monster. Additionally, going through the whole Fight Cave on this culling task may yield up to 77,523 Slayer feel. This consists of all waves up to 63, including killing viii Yt-HurKots (two waves) and TzTok-Jad himself. It is highly brash to get a total slayer helmet or a focus sight earlier attempting this task with range. With the boosts from these helmets, effective players with high combat stats can complete the caves in well under an 60 minutes, yielding relatively high feel per hour.
The Slayer experience breakdown of a Tzhaar Fight Caves task is:
-
- 48 Tz-Kih * 76xp = 3,648xp
- twoscore Tz-Kek(big) * 162xp = 6,480xp
- lxxx Tz-Kek(divided) * 162xp = 12,960xp
- 36 Tok-Xil * 202xp = 7,272xp
- 34 Yt-MejKot * 280xp = 9,520xp
- 33 Ket-Zek * 361xp = eleven,913xp
- TzTok-Jad = 250xp + 25,000xp = 25,250xp
- 8 Yt-HurKot * 60xp = 480xp
If a player fails/chooses non to complete the fight cave (successfully defeat TzTok-Jad), he/she can outset the fight caves over to fight lesser creatures to complete the task. The job will end when the player reaches 280 kills. Afterward, the player can continue progressing through the Fight Caves, but they will no longer receive Slayer xp or the bonuses from the full slayer helmet or the focus sight.
Rewards

A close up of the Fire Cape.
If you lot are successful in completing all the waves and defeating TzTok-Jad, y'all will be rewarded with 16,064 Tokkul and the much-coveted and non-tradeable burn cape. This cape has an animated "lava" pattern. The animation shows lava flowing downwards continually.
The Burn down cape is widely considered one of the best melee capes in RuneScape. It provides aplenty protection, prayer, and melee critical bonuses only equalled or surpassed by the Max cape, Completionist cape, and TokHaar-Kal. Numerous other capes, such as trimmed skillcapes, Ardougne cloaks, and most notably the Soul Wars Greatcoat, provide higher Prayer bonus.
The Burn cape as well gives the power to obtain an Ice strykewyrm slayer chore without using slayer reward points to purchase that ability, and doubles the damage of fire spells while slaying them. In add-on, it adds 40 harm to all attacks against them. Water ice strykewyrms are the but monster to drib the Staff of light.
Defeating TzTok-Jad later after obtaining the Fire greatcoat awards the actor with some other Fire cape and 16,064 Tokkul, assuasive you to take more than one fire cape at a time. Any spare fire capes tin too be sold to TzHaar-Mej-Jal for 8,000 Tokkul per cape.
If a role player dies in the fight caves, they will still get Tokkul, but non as much as they would if they defeated TzTok-Jad. The further a role player gets, the more Tokkul and if 1 dies at TzTok-Jad and so they will only receive 8,064 Tokkul—about half the corporeality than if the player defeats TzTok-Jad.
Every bit of 9 November 2009, defeating the Fight Cavern and TzTok-Jad rewards the actor with double Tokkul.
Achievements
Trivia
- When the minigame was first released, yous could non log out during the Fight Caves without giving upward all of your progress. It is now possible to logout during the fight caves and pick upwardly where you left off. When the logout push is clicked, the player will receive an pick to logout immediately or at the stop of the electric current wave. If they chose to logout immediately, the player will exist required to re-practice the moving ridge they were on when trying to log out. Additionally, if a role player clicks the logout push button while fighting a monster, the player will appear to log out, just the "Connectedness Lost" screen volition appear, and the player will find themselves back for the adjacent level.
- If, however, y'all exit the cavern earlier defeating TzTok-Jad, you will lose all of your progress. Additionally, if you teleport out of the cavern instead of leaving by the entrance, y'all volition not receive whatever Tokkul.
- At RuneFest 2011 Mod Mark announced the then un-named Fight Kiln minigame, which requires the sacrifice of ane fire cape to enter which allows infinite tries at defeating the boss.
| Minigames | |
|---|---|
| Team |
|
| Solo | |
| PvP | |
| Removed | |
Source: https://runescape.fandom.com/wiki/TzHaar_Fight_Cave
Post a Comment for "Can I Log Out Again at Jad"